Four Nights of Salmon

About week ago, my co-worker, Mirta, told me her brother-in-law goes fishing in Canada.  Well, he gave her a halved salmon, which weighed about seven pounds (3.18 kg).  I wished I would have taken a picture of it.  Mirta told me that her attempts to cook any of the salmon provided by her brother-in-law have been disastrous!  Actually, her daughter told me that. So, I said, “Bring the salmon to me, and I will make dinner for you!” As you may imagine, seven pounds salmon provides more than one meal.

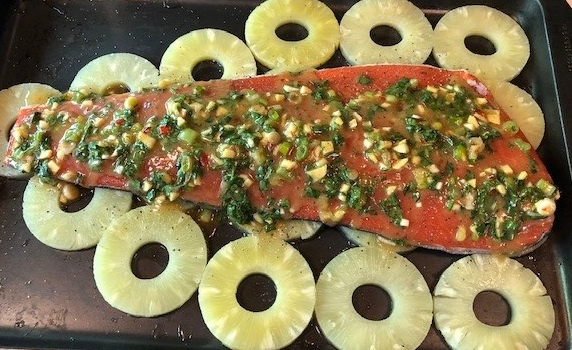
On the first night, I made salmon and pineapple, the featured image.  I should have taken the picture after it was baked!  I snapped this one just before baking. I does  not look as interesting.  My friend share this with me. Here’s the recipe:

1 pineapple cut into flat slices (or 1 can of pineapple rings)

Spread the pineapple on the bottom of a baking sheet.  Lay the salmon, skin side down,  on top of the pineapple.  Then mix the topping.

Combine in a bowl:

  • 1/4 cup (60 mL) melted butter
  • 3 tablespoons (45mL) sweet chili sauce
  • 1 small handful of chopped cilantro
  • 3 -4 cloves minced garlic
  • 3 teaspoons (15 mL) sesame oil
  • 1/2 teaspoon (2.5 mL) piri-piri style spice (Pequin chilies, Spanish paprika, salt, lemon peel, and Greek oregano)

Mix well and spread on salmon.  Bake at 375 degrees (190.6 Celsius) until salmon begins to become opaque and shows a little whitish “ooze”.  It also begins to flake a bit.  Before I put the salmon on the table, I toss toasted, crushed sesame seeds and copped green onions.

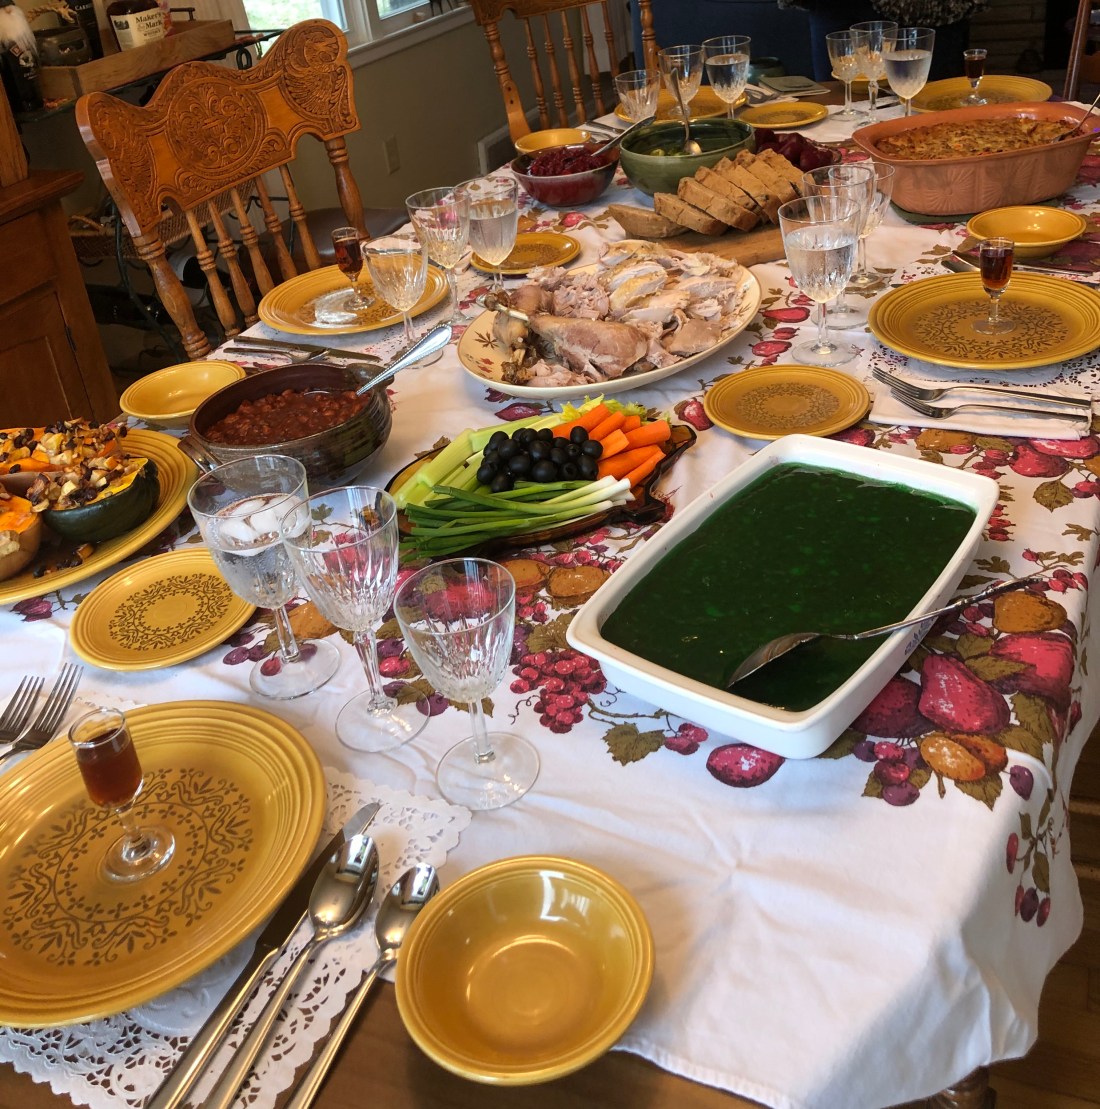
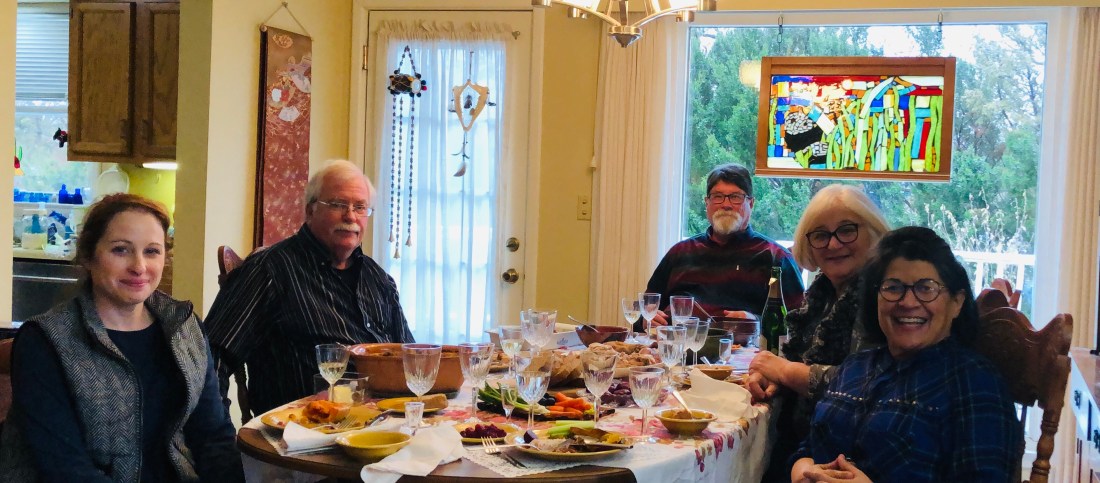
Mirta, her daughter and two friends joined us for this meal.  I served it with a Sauvignon Blanc, sauteed green beans, and brown rice with a Waldorf salad made with Colorado honey crisp apples. We ate only one quarter of the salmon, which meant three more nights of “left-overs.”

Second meal:

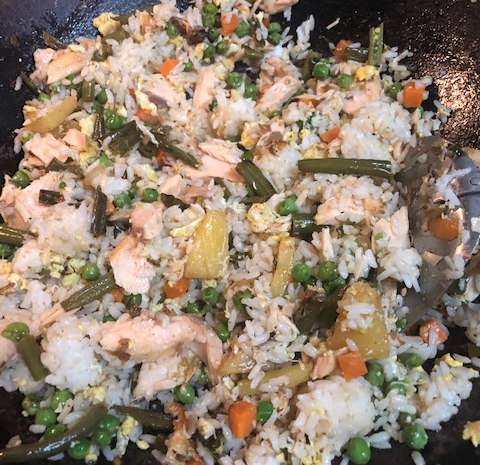
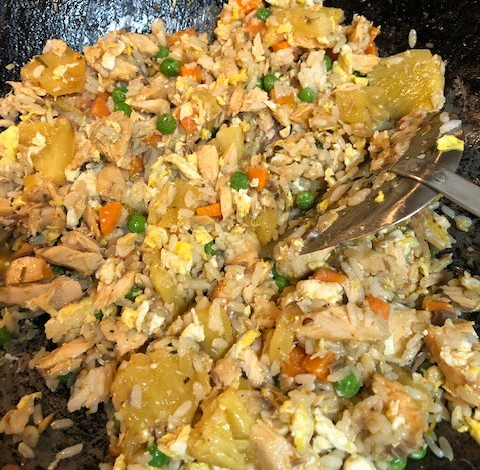
Salmon Fried Rice for Breakfast

The next morning, since we had the salmon and the rice, we make breakfast friend rice.

I love to use my wok, so this is the perfect time for it.

Sweat green onions and celery.  Add two eggs. Cook until eggs are finished.  I used the left-over green beans from the previous night and a few chunks of the pineapple. Add cubed carrots and peas. Add cooked rice.  (Ours is cooked in a rice cooker, which keeps it at the proper temperature for two days).  Add the Salmon.  Season with soy sauce and Siracha. Cook it all well.  Serve hot!

IMG_4582

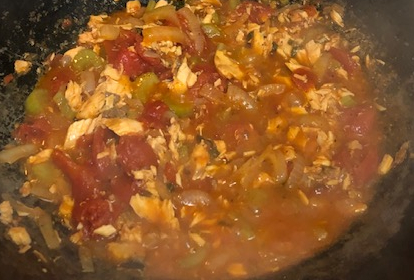
The Third night: Salmon and Rice

My husband’s mother grew up on Hawai’i.  She and her family came to the Islands from the Azores.  One of Mama Mathilda’s favorite dishes was “salmon and rice” which she made from canned salmon. for this recipe, I used another chunk of the fresh salmon from two nights ago.

  • Saute onion, celery until translucent
  • Add one can of stewed tomatoes
  • Add 1/4 cup (59 mL) white wine

Cook until sauce has thickened.  Then add 16 ounces (0.453 kg) salmon.  Cook until the salmon is cooked through and the sauce is rather thick.  Serve over hot rice.

IMG_4587


On the fourth and final day of using Mirta’s salmon, my plan was to make salmon patties to be served with toasted sourdough bread and condiments.  However, after a long day at work, I got lazy and made salmon fried rice again!  I do not have the habit of preparing the same meal twice in a week, but we really like salmon fried rice!  Mostly, I followed my recipe, as previously outlined, but this time, I used the remaining roasted pineapple, which gave a wonderfully sweet and savory flavor.  We enjoyed this meal with sparkling water as our beverage.

60082703623__BB74FEF4-C5D2-4981-8953-5A6FE36A76D2

Even when the most horrid day at work happens, there remains the delights of creating something tasty for an evening meal.  It’s great therapy and good medicine!

My favorite cookbooks are those without measurements, like Pino Luongo’s There’s a Tuscan in the Kitchen.  He tells stories of the foods of his region in Italy.  He describes the history and the genealogy of the region, and outlines what you need to make these dishes.  Because he describes the emotions and the tastes, he leaves it to the reader to determine the measurements.  I’ve made some of my guests’ favorite dishes from that book.  As previously blogged, also I love Sean Sherman’s The Sioux Chef’s Indigenous Kitchen. It reminds me of my grandmothers’ cooking.  Experiment in your kitchen!

Thank you for reading.

Thankful – For Friends, Family, and Food!

For a Native American with a long history of Indigenous ancestry, the holiday of Thanksgiving offers a mixed bag of emotions.  United States history would have you believe Thanksgiving was a time when Pilgrims (colonists) had a meal where they fed the Indigenous souls who inhabited what is now the United States.  Of course, my ancestors were treated as “hostile” because we fought when having our lands taken away from us by laws that excluded us from owning the lands on which we hunted and gathered our food, raised our families, and build our habitats.  Be that as it may, we Natives continue to celebrate a National Day of Mourning to acknowledge an era that would change our lives for ever.

My family celebrated and continues to celebrate a Thanksgiving meal with thoughts that turned to what our ancestors’ experiences and when their lives changed after colonization.  Because of the time of the year, we also used it as a time to honor our Creator for the bounty of food given to us from the land, from the seas, and from all the elements that made life possible.  So I continue that tradition today.

Let’s discuss what was on my table on “Thanksgiving Day.”  A thwarted trip to my home state (Colorado) because of heavy snows, a rock slide on one of the mountain passes, and sloppy driving conditions gave the green light for us to “stay put.” We decided to stay home, cook the big meal, and find someone to feed.  I learned from my Mother’s holiday meals that they had to be vast, take  a long time to cook, and had to have a variety of offerings on the table.  Here’s my menu:

  • Aperitif: Sweet Vermouth
  • Roast Turkey
  • Sauteed, Buttered Brussels Sprouts with Sliced Almonds
  • Savory Dressing
  • Squash “Boats” (recipe follows)
  • Pickled Beets
  • Relish Tray
  • The Ubiquitous Two-layered Jello Salad
  • Baked Beans
  • Cranberry Apple Orange Spice (CAOS) Jam
  • Sourdough Bread
  • Cava (Sparkling Wine from Spain)

Dessert:

  • Pumpkin Pie with Whipped Cream for Dessert
  • Creme Sherry

I began my own tradition of making my “signature” Cranberry Apple Orange Spice jam, also known as “CAOS” (pronounced, Chaos) because I loved the taste of the combined fruits with the added Chinese 5 Spice, and I didn’t like the store-bought cranberry in a can that came out like a lump!  I love the aroma of my CAOS even more!  Next time you create your “Cheese Board” or your “Charcuterie Board”, I highly recommend pairing CAOS with brie, fried Mexican panela, or with goat cheese.  The flavors come together quite nicely.  Also, I make a Fig Apple jam that goes nicely with cheeses.  I had spoken of CAOS in one of my previous posts.  Let me know if you want the recipe.

IMG_4209

Here’s the recipe for my “squash boats”.

  1. Wash and slice two acorn squash.  Clean out seeds. Assemble on a baking pan.  You should have four “boats” into which you add this mixture:
  2. Two apples: Cored and diced with skins. I like honey crisp.
  3. Two oranges: Diced with peels
  4. 3/4 cup (96g) raisins
  5. 3/4 cup (96g) Walnuts
  6. 2/3 cup (85g) salted butter
  7. 2/3 cup (85g) brown sugar
  8. 3/4 cup (96g) brandy

Preheat your oven to 365 degrees (185 Celsius).

Add ingredients (#2 to #8) in a bowl.  Mix well and spoon into prepared squash.

Put an additional pat of butter on each boat before you put into oven.  Bake until the squash is soft and the fruits are bubbly.  Serve whole boats on table.

I knew I wanted to cook a large meal, but most people we knew had plans, and we’ve only lived in this town since last May.  I called one set of our best friends who live a little more than two hours away.  Their daughters would not be joining them for Thanksgiving, so I said, “Come spend a few days with us, and eat Thanksgiving!”  They agreed, and we had a marvelous time!  I am so grateful for friends.  I miss our children and grandchildren, and my family, and I am so fortunate to have friends.  I see them as “adopted” family, certainly.


IMG_4173

Our lovely day, filled with warmth and laughter, ended with turkey sandwiches and more laughter.

Thank you for reading.

It’s Time to Return to Blogging

Too much time has passed since my recent blog dating back to September when I paid tribute to our deceased daughter.  Since that time, I visited by home town, as the featured photo shows, and I’v had a life-changing event: a new job!

Now, I have been on my new job, which was a move from one department to another at the university where I work for nearly one month.  I have gone from social researcher and community educator to another exciting job that works to ensure the success of multicultural students.  Now remember, “multicultural” means all cultures!  One thing that I’ve realized in my work with the many cultures, ethnicities, and dominant populations these past 25 years is that many think the word, “multicultural” means anyone who is not White and middle-class (in the United States).  That means finding common definition or understanding to assure that 1) Every human is from a culture, 2) Everyone has an ethnicity (belonging to a social group that has a common national or cultural traditions), and 3) Every human can find common ground from which to build a relationship.  As you can see, I have my work cut out for me.

One thing I didn’t report, here, is that my former work was at an agricultural experiment station in SW Kansas.  Now I am on the campus, which is 4.5 hours away.  That means sell a house and buy a house.  Wish me luck.

So, in terms of friendships that change because they have become long-distance, I have wonderfully close friends in my former town.  I will see them often, for now, because I go “home” on the weekends. I am making new friends, too.  I will return to my soon-to-be former home this weekend to eat, drink, and be merry with my friends.  I love them dearly.  I have gone to a few dinner gatherings since being in the town of my new position.  Since many of our readers like food, I will share a newly-created appetizer that I took to one of the gatherings.

It’s a fruit, cheese, and nut medley, and I’ve named it, “Fall Colors”.

1 bag of fresh cranberries

2 oranges

1/2 cup (64g) coconut sugar

2 teaspoons (8.5g) Chinese 5 spice

One “log” of goat cheese

1 cup (28g) shelled walnuts

Brandy or vanilla is optional (brandy would be added during cooking and vanilla added when removed from the heat)

To make the compote, chop the oranges (peeling and all) and combine with the other ingredients in a saucepan to cook gently until the liquid comes out of the cranberries and oranges and the compote is thickened.  Remove from the heat.  If you use vanilla, add it now.

After the compote has cooled, place the goat cheese on a plate, and arrange the compote around the cheese, and top with the walnuts.

Fall-Colors-compote-and-goat-cheese.jpg

When you scoop it up, make sure you have a nice distribution of the cheese, compote and the nuts so that you have the advantage of all the flavors.  It goes well with nut crackers, and enhances the taste of red wine.  I call it “Fall Colors”, because cranberries and oranges are fresh at this time in the Northern Hemisphere.

Enjoy, and thank you for reading.

A Meal for a Special Friend

In another life, I worked in Adult Education.  I worked with a fine group of women with whom I have occasional contact.  I was able to see a friend this past weekend.  Her name is Cheryl, and her expertise was early literacy for children and their, mostly, under-educated parents.  Working in adult education afforded my colleagues and me a chance to interact and work with people from around the world who came to our part of the state as political and economic refugees.  They came to our part of the state, because there are plentiful job opportunities in the agricultural sector.

Well Cheryl came for a town visit, and I was to be out of town when the old group planned a gathering – a homecoming, of sorts.   That meant I would invite Cheryl to dine with us Sunday evening.  “I will come if you don’t go through any trouble.”  Okay.  Keep in mind what is “trouble” to some is therapy for me – cooking.  So, here was my menu:

  • Grilled leg of lamb – slathered in a fresh pesto sauce before grilling
  • Caprese Salad – you may remember that I have a basil “tree” that won’t stop producing!
  • Freshly baked bread with OGB as a dip (olive oil, garlic, and basil) – featured photo!
  • Baked and whipped sweet potatoes
  • Crème de banane for dessert (an original recipe!)
  • Wine

How do you grill a leg of lamb?  We have a large kettle-style Weber barbecue.  Dale uses an “indirect” method of grilling large items such as turkey and leg of lamb.  Our friends, Bob and Adrian have a sheep farm about 13 miles away, so we always have lamb and venison, from the same county as the lamb, when I’m a fortunate hunter.  We’ll talk about venison another time.

Back to grilling the lamb.  I prepare the lamb by rubbing it with the pesto (which is well-seasoned) and black pepper.  The charcoals are prepared in a charcoal starter, which is a cylinder, which is about 2 feet tall (0.6096 meters), that has a wooden handle.  A small basket inside the cylinder holds the charcoal briquettes, which are ignited on an open fire.  Once the briquettes are glowing, they are ready to be place in the grill.  I neglected to take a picture of indirect grilling, so I borrowed an illustration from the Weber website.  Keep in mind that we roasted leg of lamb, NOT ribs.  The meat is never directly over the hot charcoals, but rather sits above a drip pan.

6-Hot-Charcoal-Briquette-Holders-in-Kettle-Grill-with-Ribs

So, you put about 25 coals on each side of the meat.  You must add newly heated coals about every 30 minutes. Once the meat reaches 130° F (54.44 C), take if off the grill and let it sit until it reaches 140° F (60 C).

Of course, I’ve written about my caprese salad, so that recipe can be found on one of my past blog posts, but here’s a picture of it.

Caprese and Pesto

Also, since I’m still working on using up basil, I decided to blend three large hands full of basil with 8 cloves of garlic and enough olive oil to make a nice liquid concentrate of OGB for later use.  I put the plenty in the freezer for later use.  Since it’s so very concentrated, I put a large spoon full on a bread plate to which I added a little more olive oil and a spoonful of  balsamic vinegar for a nice bread dip.

The sweet potatoes were baked, mashed with butter, salt, and a spoonful of pure maple syrup.  You may notice the color of the sweet potatoes are more like Yukon Golds.  Their dullness of yellow instead of orange is off-putting, but they are delicious!

Lamb and mashed sweet potatoes

I prepare banana cream for dessert.  To make it sound fancy, I used the French, crème de banane.  I found some very nice ripe bananas at the market, so I put three in a glass bowl to which I added 8 ounces (226.80 grams) of mascarpone cheese and four ounces (113.40 grams) cream cheese, one half cup of pure maple syrup, one spoonful of dehydrated orange rind (something I produce to flavor biscotti).  I whipped it all with a hand mixer until all was creamy.  I chilled the banana cream in individual “berry bowls”.  I was an interesting texture, which surprised the guests!  “Interesting!”  “Thank you!”  I think.

Banana Cream

Perhaps not as pleasing to the eye, I found it tasty and not too filling as a dessert.  We drank a rosé and a zinfindel with the meal.

Mostly, it was about reminiscing with Cheryl and getting to know her friends, Darryl and Ann.  At the end of the day, the food becomes a companion for conversation, which contributes to those convivial moments.

Thank you for reading.

Hummus and Flatbread

I am passing the week with my 82 years old brother in law (Bill) who is in treatment for cancer.  While he does not want to be “taken care of”, I cannot help but want to cook, though I am not surrounded by the things in my own kitchen.   Fortunately, Bill and his late wife stock a well-used kitchen, as far as cooking utensils are concerned.  The ingredients in the kitchen are rather dated, so I am pleased to explore the groceries of Southern California (SoCal).  My focus turns on nutrient-rich foods served in small courses, more like appetizers.  My husband and Bill’s late, Hawaiian, mother would call them “poo-poos”.  Now before you snicker, Islanders serve “Poo-Poo Platters” much the same way Spaniards serve “tapas”, in other words, small bites.

Lucky for me, I once worked with an Egyptian woman who taught me her version of hummus, and it continues to be my favorite hummus, to this day.  My first challenge is that Bill declared to me that he “dislikes” hummus and chick peas.  I said, “Fine, then I’ll make it for us!”.  So, I will let you know how I make hummus and flat bread.

I like to cook with fresh ingredients.  No, I did not grow my own garbanzo beans, but I do purchase about 10 ounces of the dried beans.  I cook those in boiling water which as been generously salted until they are soft.  Once those are cooked and cooled, I am ready to proceed.  Oh, yes!   I don’t like the high price of tahini, or sesame paste, so I make my own.

Tahini:

1/2 cup raw sesame seeds.  Put them in a small, dry skillet and heat them, stirring often, until they are brown and toasted.  Notice in the photo, what “browned” sesame seeds look like.

Once the seeds are toasted, cool them.  The next step is to grinds the toasted sesame seeds.  I have a coffee grinder that I use exclusively for spices, seeds, and other things I need to grind.  I do not grind coffee in this grinder.

When the ground seeds resemble a paste, add olive oil to support a thick paste consistency.  Again, notice the tahini in my pictures.

Hummus:

Blend – 1-2 cups soft garbanzo beans (chick peas), 4 gloves of garlic, 1/4 to 1/2 Tahini, Salt, pepper, chili powder, cumin, the juice of half a lemon, and plenty of olive oil.  Blend until you have a nice consistency, to your taste.  ( I hope I remembered all the ingredients!)

Spread the hummus in a walled plate or wide glass pan.  Drizzle olive oil and sprinkle smoked paprika on top.  I like to decorate the middle with a few, set aside, beans for garnish.  Serve with flat bread.

The whole presentation of hummus and flat bread

Flatbread:

I just use a simple bread recipe of flour, yeast, a little sugar, salt, and a little oil.  Make a good dough, and let it rise for a bit (1/2 hour).

Form the dough in small rounds, about the size of a golf ball.  Roll out and cook on a hot griddle.  Cook on one side, and when you flip it to cook on the other side, a nice bubble will form.  Then you can call it a “pita”!.  I like to cut the round flat bread into fourths.

Serve with the hummus , which is high in fiber, protein, and good fats, with the olive oil.  The garlic is good for you, too.

Oh, I should tell you that Bill, who earlier said he dislike hummus, had three servings of his “small” bites!  Turns out he loves homemade hummus!  Things are always better when we make them from scratch!  I should mention that Bill likes herring in sour cream, so we served the hummus and flat bread with a side of herring in sour cream, to take from many cultures today.  The color of the food would have looked better on a darker-colored plate, but I made do with what I had.

On the plate

Enjoy, and thank you for reading.

The Joys of Breakfast Cookies with African Tea

One of the joys of experimenting in the kitchen, is creating something that taste delicious and happens to be nutritious, as a bonus.  Some mornings, I would love to have baked goods to go with a cup of coffee or tea.  However, the crash of having food with high glycemic responses, isn’t worth it.  So, I began to hunt for a breakfast cookie that gives the satisfaction of eating baked goods but is healthy enough to sustain me until lunch time.  I found some recipes, but most had too much sugar and white flour.  I hoped for something with high fiber and high flavor, so I came up with my own recipe after borrowing, here and there, from other cookie recipes. 

I like to have one cookie in the morning (Believe me, it’s most filling!) with a cup of tea prepared the way my friends at the African Store, in town, prepare tea.  I do add less sugar than my African friends, however. 

For the four servings of the tea: 

Pour 4 cups of boiled water in a teapot containing:    

4 tea bags of  Ketepa ( Kenyan Tea Packers)  

1 whole cinnamon, broken into pieces 

1 tsp whole cloves 

8 cardamom pods 

*I like to crush, coarsely, the spices in a small mortar and pestle 

Let the tea and spices steep for 8 minutes 

Remove tea bags but not spices 

Add hot milk and 1 TBS of honey 

Serve with Breakfast Cookies 

Protein Breakfast Cookies 

Ingredients  

  1. 1/2 cup salted creamy peanut butter or almond butter (I prefer almond butter) 
  1. ¼ (or a little more) cup honey  
  1. 1/2 cup mashed bananas 
  1. 2 eggs 
  1. 2 tablespoons coconut oil melted 
  1. 1 cup zucchini shredded (I like to use shredded carrots and apples) 
  1. 1 1/4 cups organic rolled oats 
  1. 3/4 cup almond or hazelnut meal (I like to use ½ cup nut meal and ¼ cup protein powder) 
  1. 2 teaspoons ground cinnamon or Chinese 5 Spice 
  1. 1 teaspoon baking powder 
  1. 1/2 cup raisins, or dried cranberries 
  1. 1/2 cup pecans (or whatever type nuts you prefer) 

Directions 

  1. Preheat the oven to 350ºF.  
  1. Add the first 5 ingredients into a large mixing bowl and whisk to combine. 
  1. Mix in the shredded zucchini or carrots/apples. 
  1. Add the oats, nut meal, baking powder, and cinnamon (or Chinese 5-Spice) and mix until all the ingredients are fully incorporated. 
  1. Fold in the dried fruit and peanuts. 
  1. Use a large ice cream scoop or 1/3 cup measure to scoop out 4 cookies per baking sheet. Use your hands to press down the cookies to 1/2-inch thickness. 
  1. Bake the cookies for 20-25 minutes, rotating the pan halfway through the baking time. 
  1. Allow the cookies to cool completely on the baking sheet before removing from the pan. 
  1. Enjoy this hearty, protein-packed breakfast delight with a cup of coffee or tea! One cookie in the morning, keeps you satisfied until lunchtime! 

Yield 14 cookies 


Eggplant Parmigiana – Made Simply

I might be a little brain dead at the moment, so I’ll just write about this evening’s dinner.  Again, I didn’t set out for this to be a blog only about food, though its preparation wanders into a sort of therapy for me, sometimes.  I have many topics on which I want to share.  I don’t want to be boring, however.  Sooner or later, I plan to discuss food in books a bit more along with other points of interest such as music, film, history, culture, and themes of social justice.  Let’s continue with food, for now.

My all-time favorite cookbook, given to me by my friend, Lynn, is more of a story book, called There’s a Tuscan in my Kitchen, written by restauranteur, Pino Luongo, who hails from Tuscany (Toscana) region of Italy.  Tuscany sits on the same latitude as Corsica (birthplace of Napoleon) and would be considered the upper part of the “boot” (but not the upper flaired part!), that is Italy.  The Tuscan region is on the Ligurian Sea.  Luongo’s book tells a story of each featured dish. My favorite part is that he does not give the reader/cook ratios and measurements for each dish.  He trusts the reader to make his/her own judgement.  He does list the ingredients based on where one might find them: pantry, cold storage, and market.

Yes.  I love Luongo’s book, but my food travel, this evening, goes north to Parma!  This evening’s menu: Eggplant Parmesan on linguine (literally, “little tongues” from the Liguria region west of Parma).

Since my basil garden continues to be quite prolific, I have a goal of incorporating the “mint cousin” into as many dishes as possible.  First, however, I sliced the eggplant, and salted it on each side before laying the slices on paper towel to drain from lunch time to evening.

eggplant-draining.jpg

My sauce:

  1. 1 can whole tomatoes
  2. 1 very large bunch fresh basil leaves
  3. 4 cloves of garlic
  4. ¼ yellow onion
  5. 1 TBS mix of dehydrated and ground onion, celery, and mushroom (my own creation)
  6. Salt and pepper
  7. ¼ cup red wine

Blend all ingredients, then pour into cooking pot and simmer for three- four hours (I put these ingredients in the pot when I came home for lunch and simmered on low until I returned).

Put 2 eggs into a pan.  Dip the sliced eggplant in egg mixture then in flour before placing in hot oil to fry until golden brown.  Place browned slices into a glass cake pan in one layer until all slices have been browned.

Pour your simmered red sauce on the browned eggplant slices, then cover with Parmesan cheese and mozzarella.  Bake in a 350-degree oven until the sauce is bubbly and the cheese is browned.

EPP in the pan

Serve the eggplant and sauce on top of linguine or spaghetti.  Enjoy with a salad and a beverage of your choice.

Thank you for reading!


Pizza: Origins of the “Humble Pie” and Whipping up a Pizza After Work!

According to the History Channel’s website, there’s a great history of the pizza.  In the town of Naples, in the 1700s, the working class devised a way to get eat large amounts of calories in an easy way: flat bread with oil, cheese, and other toppings.  It was an inexpensive and portable meal that could be consumed in haste.  Seen as a food for the lower classes, pizza became popular when Queen Margherita visited Naples in 1889, and fell in love with the “pizza mozzarella”, which now bears the name of the young queen. Word has it that the queen, especially, liked the fact that the pizza bore the colors of her country’s flag!

Pizza can be made quickly, after work, for a delicious and special meal for you, your family, or for friends. You don’t need fancy ingredients, just be creative with what you have.

A few days ago, I told you about my windfall of basil and about dehydrating veggies for use as seasonings in my cooking and baking.  Last evening, I fixed yummy pizzas after work.

Pizzas from scratch are quick and simple, and the activity can easily contribute to a fun party with guests.  All you have to do, is make the dough, and seal it in a large bowl, for up to an hour, until you’re ready to divide it for your visiting pizza makers.

For my pizzas, last night, I made a pesto and added extra ingredients to make it more zippy, than usual, for the sauce.  It was delicious for lunch, today, too!  We ate it cold!

Pesto Pizza Sauce:

One bunch basil (about 1 cup of leaves)

¾ cup olive oil

¼ cup parmesan cheese

¼ cup of ground hazel nuts with two juniper berries (I did not have pine nuts, so improvised)

3 cloves garlic

1 tablespoon of dehydrated onion, celery, tomato, and chili peppers

Blend to a liquid consistency – set aside

Pizza dough:

2 cups flour

Warm water

¼ cup Honey or sugar

Mix and wait until bubbly

When it’s bubbly, add 1 tsp salt, 1 tsp salt, and 1 TBS oil

Add enough flour to make a thick dough – let rest

Knead and add enough flour to make a nice dough

Roll out flat and place on your gas grill to set the pizza dough – turn over to slightly brown on the other side. Grilling the dough also gives it a wonderful, smoky flavor.

Remove from heated grill and spread pesto pizza sauce on browned pizza dough, add cheese and other toppings.  Place back on grill until finished.

Enjoy with a nice salad and a glass of wine.

Thank you for reading.

Reference:

Turim, G. (2012). A Slice of History: Pizza Through the ages. Access date: August 10, 2018,

https://www.history.com/news/a-slice-of-history-pizza-through-the-ages


History of Mince Pie and a Recipe

I was an English major as an undergrad and for graduate school.  It was later that I worked in Human Ecology for a second grad school.  I must say that I fell in love with the food in so many British and American classics such as Great Expectations by Charles Dickens, Huckleberry Finn by Mark Twain, and the books by Jewish author, Chaim Potok.  One thing these books had in common was superb descriptions around food preparation.  Oh, I forgot to mention that Patrick O’Brien’s books about the British fleet on the high seas during the Napoleonic Wars were full of great description of the foods on board a ship.

One of the things that peaked my interest in Dicken’s Great Expectations was the traditions around the food.  Especially those served during holidays.  In case you have not read Great Expectations, there’s this great scene where the story’s main character, “Pip” stole mincemeat from a jar in the pantry to feed an escaped convict, named, Abel Magwitch.  This was an act that endeared Pip to Mr. Magwitch forever.  Earlier in the story, before the theft, Pip’s sister, Mrs. Joe, had already made the “handsome mince pie” for the holiday gathering, so she did not notice any missing (Dickens 22) shortly after Pip had stolen it to feed his convict.

I love mincemeat!  I continue to be intrigued that my Native American grandmother, born in the New Mexico, made mincemeat much the same way that the Brits made it.

Mincemeat has its origins in thirteenth century England when the aristocracy kept large amounts of dried fruits in their larders because varying climate made the storage of fresh fruit impossible.  In addition to the variety it added, dried fruits served to disguise meat past its prime. Mrs. Joe likely served it because of tradition, and almost everybody in England continues to eat mince pies at Christmas, presently (Hale 86).  The World Atlas of Food cites “Mrs. Beeton’s Household Management of 1856-1861” as having the original mincemeat recipe, which bakers continue to use today.  It includes raisins, currants, lean rump steak (my grandma used beef tongue), beef suet, sugar, candied citron peel, lemon peel, orange peel, nutmeg, apples and brandy all mixed and stored in glass jars to mature for about two weeks (87). The Kerr Home Canning and Freezing book written more than a century later offers the same basic recipe as well (25). However, Kerr promotes the use of a pressure canner, 10 pounds of pressure for 90 minutes. Mincemeat’s function, besides serving as a sweet treat, lay in its relatively long shelf life, essential in not having adequate refrigeration (Davidson 507).  At Pip’s Christmas dinner, the mince pie came just before the “savory pork pie”.   Here’s a notes about pie crusts:

Quick Pie from Scratch

After finishing a lovely meal on a cozy winter evening, one of our friends said, “I wish we had a pie!”  Luckily, our dear friend, Mary Lake, was at table, too.  She’s one of the best pie-makers in the world!  Mary and I bet, those around the table, that we could produce a pie from scratch in 30 minutes.  The race was on!  The stop watch began.  Mary got busy making her famous oil crust, and I set to getting the apples ready.  Fortunately, I had several quart jars of canned apples from the previous summer’s windfall of crispy, sweet apples.  I dumped a quart of apples in a bowl with 2 tablespoons of quick tapioca, cinnamon, 3 tablespoons sugar, and a pat of butter.  Here’s Mary’s crust recipe:

2 cups of all-purpose flour

Dash of salt mixed in flour – put flour/salt mixture in a bowl.

½ cup of vegetable oil (Mary likes corn oil for its nutty flavor)

5 tablespoons buttermilk (Make some with milk and vinegar if you have no buttermilk on hand)

1 glass pie plate.  It must be a clear, oven-proof pie plate.

With a fork, emulsify the oil and buttermilk until well blended.

Add to flour mixture

Stir with a fork until all flour is well-moistened

Divide, and put half of the dough on a square sheet of parchment paper. Shape into a round, flat disc without handling the dough too much. Place another square sheet of parchment, and roll out the dough with a rolling pin.  Once the dough is the size of your glass pie place.  Shape to the pie plate.  Repeat for the top crust.  Once the top crust is rolled out, place the fruit in the pie plate with the bottom crust.  Settle the fruit in to the crust, and then place the top crust. Shape the edges of the pie crust, cut air vents with scissors, and sprinkle crust with cinnamon sugar.

Place your pie in the microwave oven for 12 to13 minutes.  Meanwhile pre-heat your conventional oven to 400°.  After the time sounds for the microwave, remove the pie from the microwave, and place it into your conventional oven for 12-13 minutes, or until the crust is browned.

Mary and I put our apple pie on the table in 35 minutes.  The microwave oven gets the fruit cooking and thickened.  This shortens the time in the conventional oven, and prevents burned edges.  Starting the pie in the microwave only works for fruit pies.  Do not try with custard pies.

The featured picture is the mincemeat pie with the oil crust.  You can see that the crust is tender and flaky.  I did not add the cinnamon sugar mixture here, but it gives the crust a beautiful glow.

Mmmmm…I’m hungry!   Thank you for reading.